Mark products as tickets
Here’s your key step: let Lomeo know which of your Stripe products work as tickets.
Open your Stripe Dashboard and click the Lomeo icon at the top of the screen. A drawer will slide open on the right, displaying your list of active products. If you have not yet created any products, Lomeo will first guide you to create a new product.
Toggle on any products you wish to sell as tickets. Once enabled, every time someone purchases one of these products using Stripe Checkout, Payment Links or Invoicing, your customer will automatically receive an email containing their ticket and unique QR code.
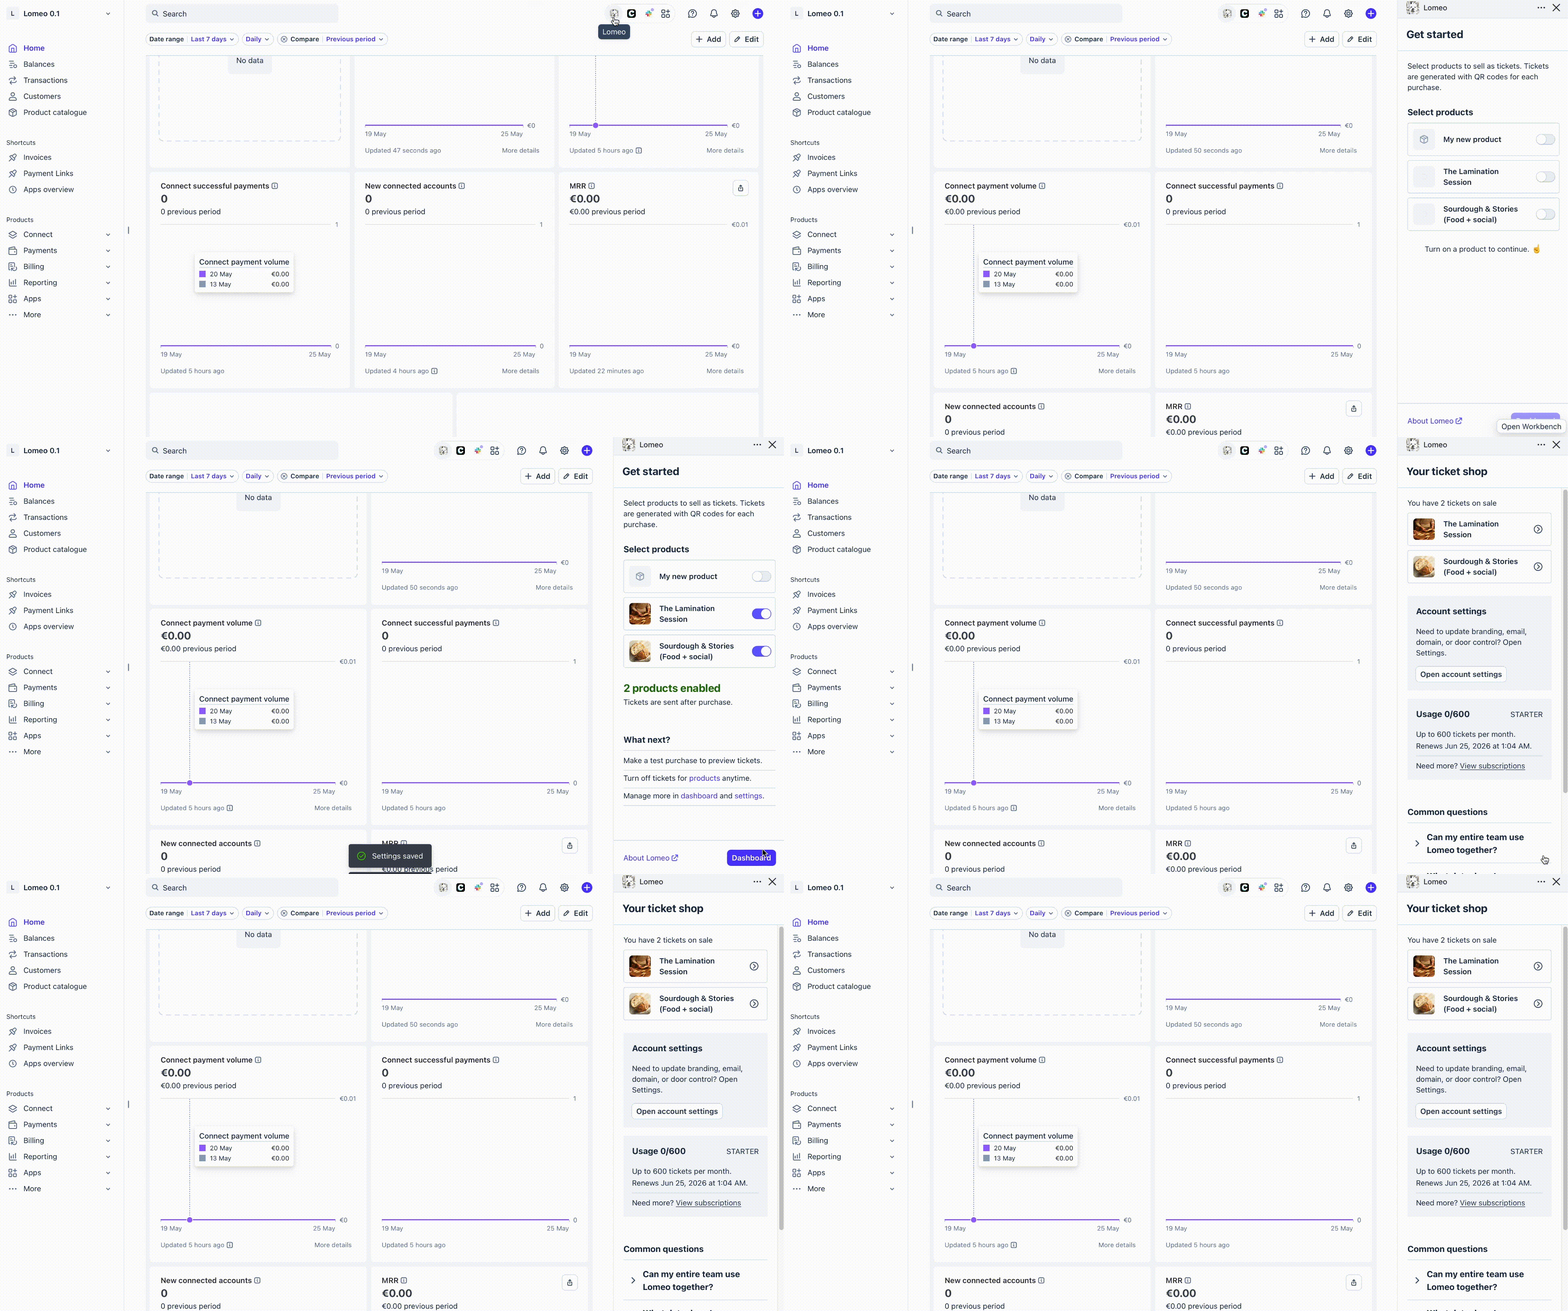
If a customer purchases multiple products in one order and only some are ticket products, the ticket email will only feature the ticket products.
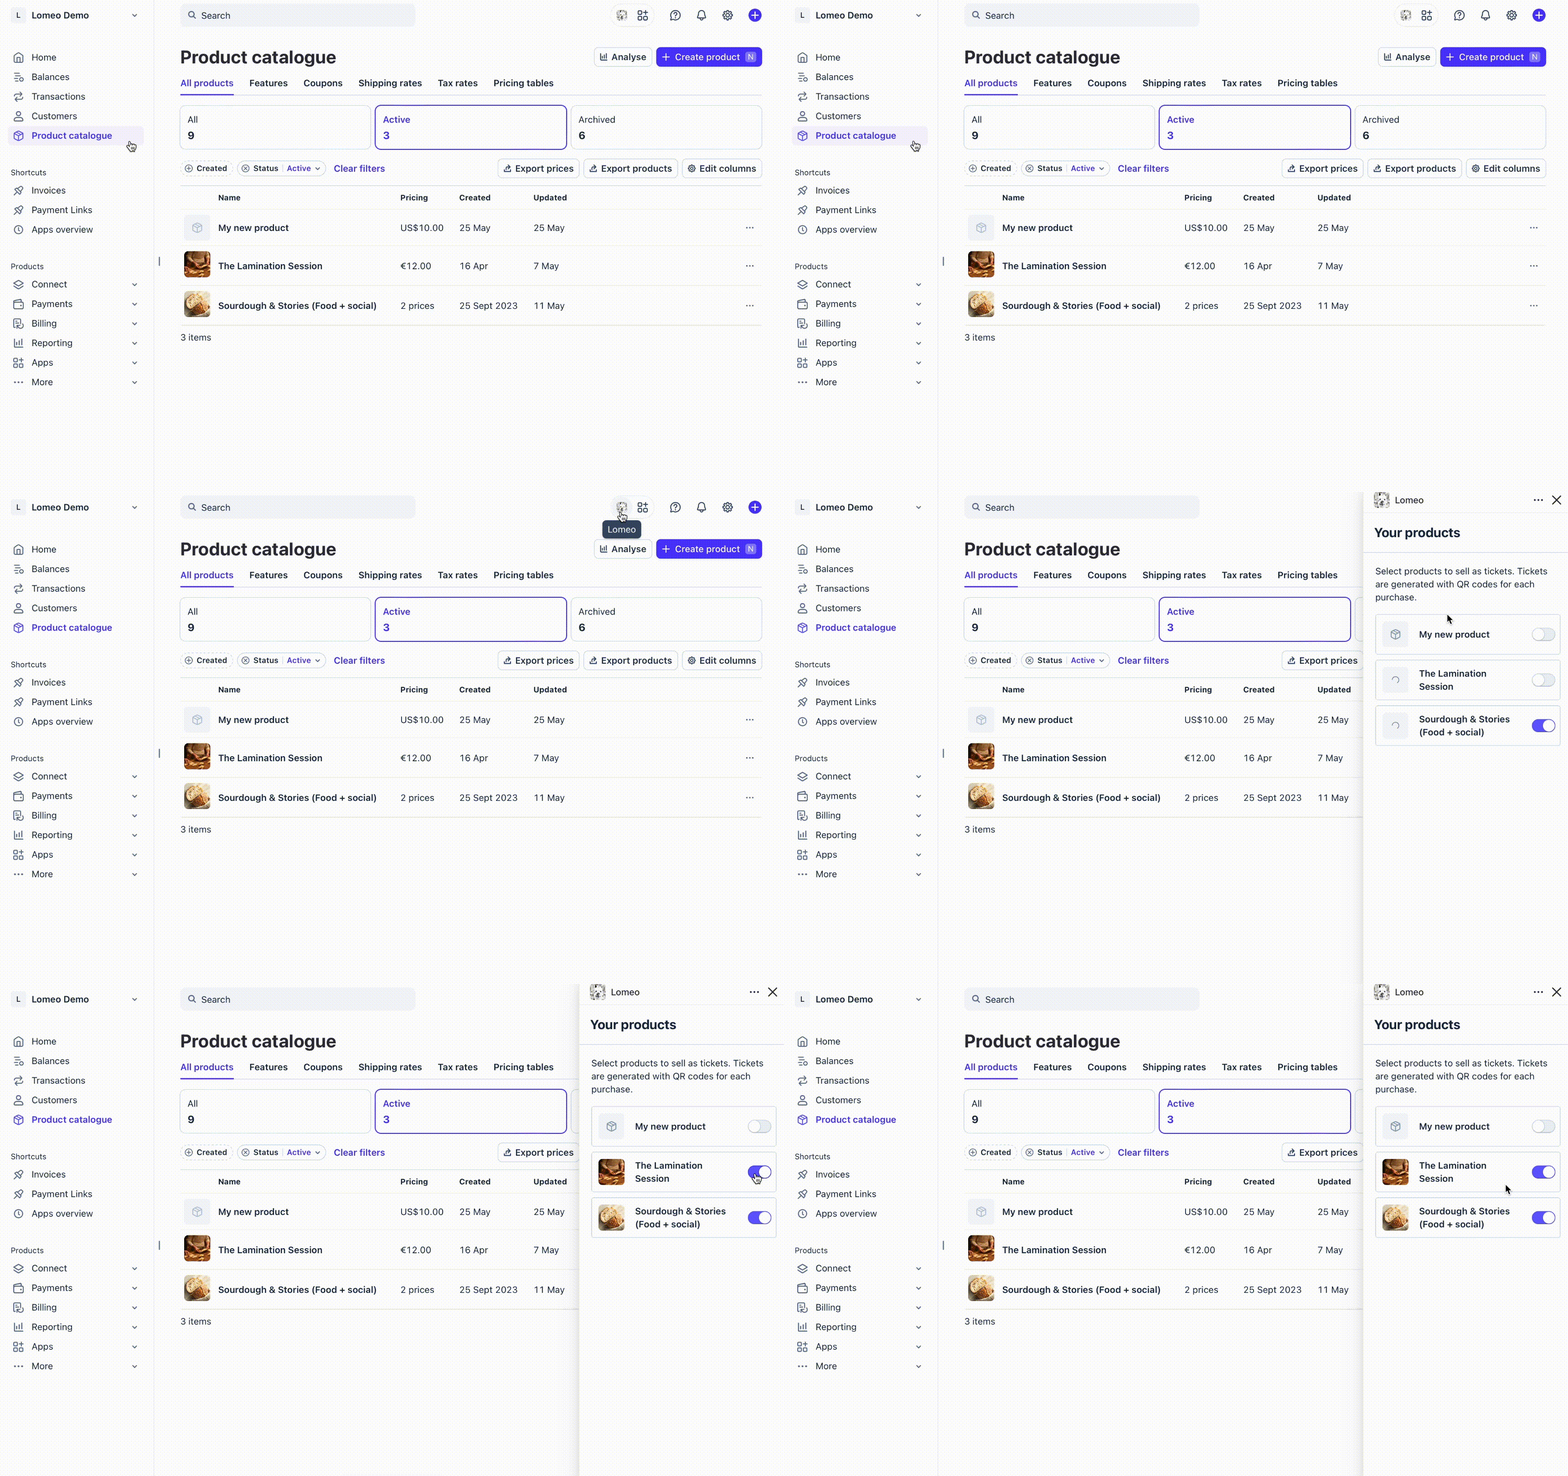
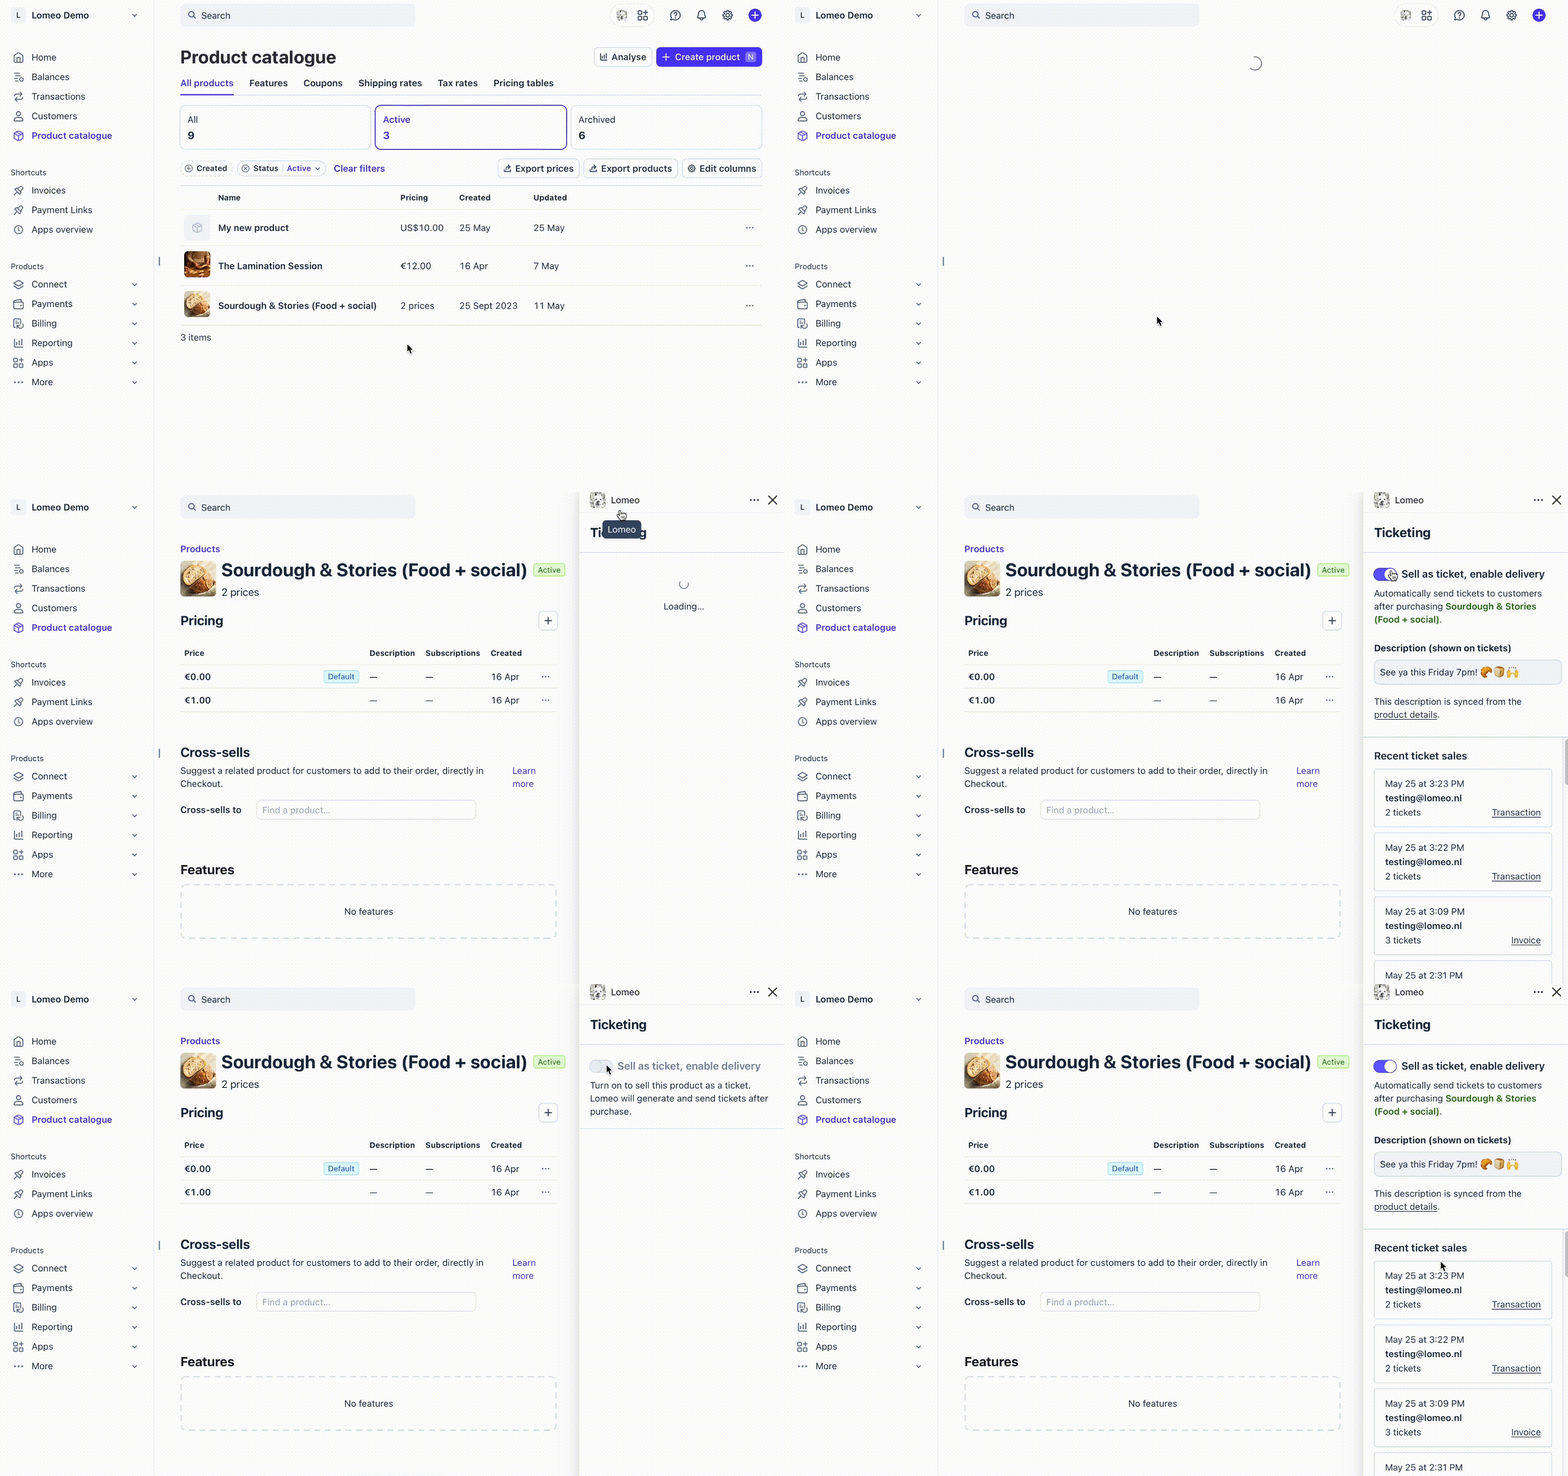
You can also enable or disable ticket products from two other locations - the product catalogue and the product detail page.
(1) Product catalogue page
Navigate to the product catalogue page and open the Lomeo drawer. You will see a list of your active Stripe products — simply toggle on any items you plan to sell as tickets.
(2) Product detail page
Head to any product detail page and open the Lomeo drawer. Toggle the switch on to sell this specific Stripe product as a ticket.
Lomeo takes effect immediately once products are marked. Place a test order and check the ticket email you receive.
Want to customize the ticket email? You can add your custom domain, use your Stripe branding (logo and colors), and tailor the message attendees receive.
Supported Stripe flows
Lomeo sends out QR tickets once a payment completes in a supported Stripe flow: whenever a customer finishes paying via Payment Links, Invoicing, or Stripe Checkout and their order includes ticket-marked products, Lomeo immediately emails them a QR ticket.
Note: Stripe Subscriptions (products with recurring prices) are not officially supported. Even though it may work technically, Lomeo is not optimized for subscription products.