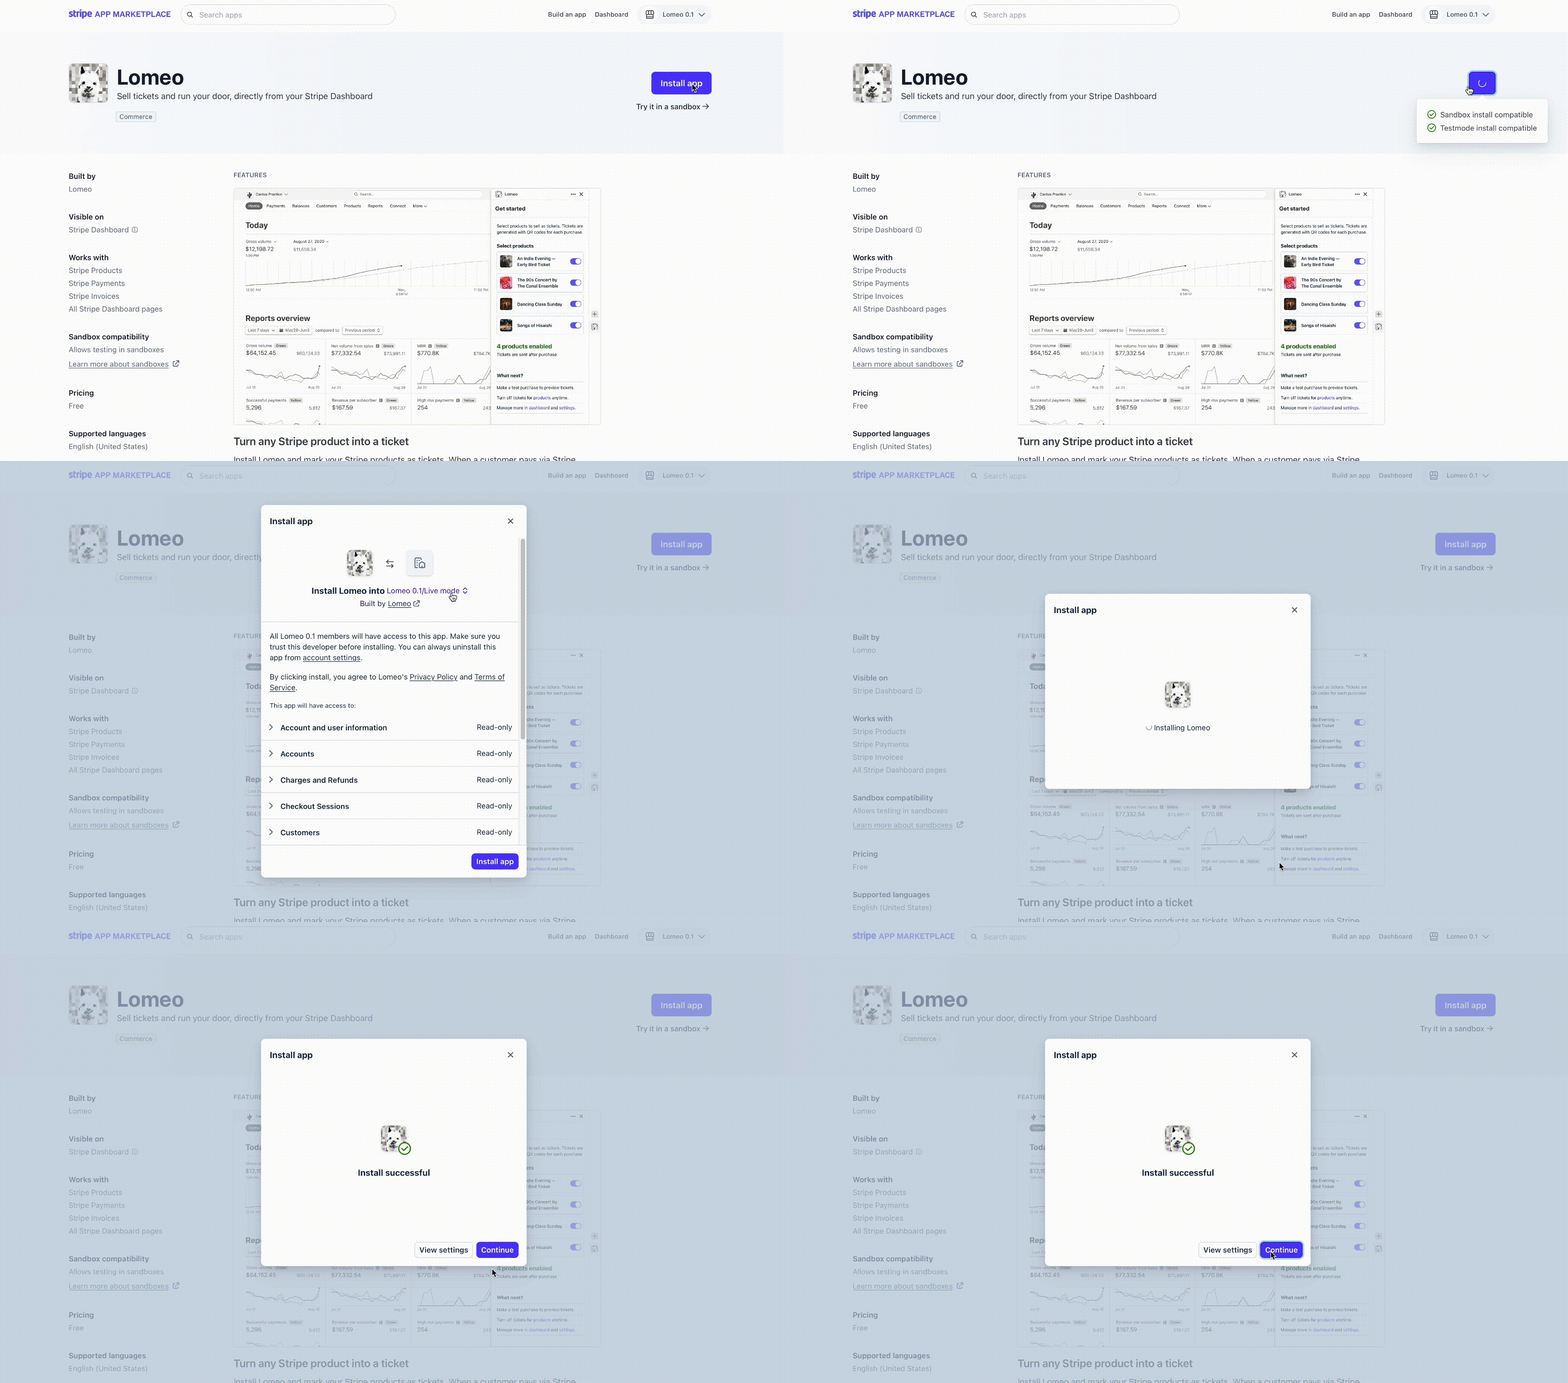
Getting started

Lomeo is built on top of Stripe, adding ticketing functions to Stripe's payment infrastructure. To use Lomeo, you need a Stripe account first.

Already on Stripe? Install Lomeo from the Stripe App Marketplace: https://marketplace.stripe.com/apps/lomeo

Live mode or Test mode?
Lomeo works in both environments. To sell real tickets, you need Live mode — make sure your Stripe account is verified to accept payments.

Once installed, Lomeo uses your Stripe account for authentication. No separate account is created, and we only store information needed to operate the app.

Install Lomeo App on Stripe

Mark products as tickets

This is the most important step: telling Lomeo which of your Stripe products are tickets.

Open the Stripe Dashboard and click the Lomeo icon at the top of the screen. In the drawer on the right, you'll find a list of your active products. If you haven't created any products yet, Lomeo will prompt you to do so.

Toggle on the products you want to sell as tickets. From that point on, every time one of these products is sold via Stripe Checkout, Payment Links, or Invoicing, your customer will automatically receive a ticket email with their QR code.

Lomeo ticket setup in the Stripe Dashboard, mark products as tickets during the onboarding process

If a customer purchases multiple products in one order and only some are ticket products, the ticket email will only include the ticket products.

You can also enable or disable ticket products from two other places:

(1) Product list page:

Lomeo ticket setup in the Stripe Dashboard, mark products as tickets on the product list page

(2) Product detail page:

Lomeo ticket setup in the Stripe Dashboard, mark products as tickets on the product detail page

Lomeo is immediately working once products are marked. Place a test order and check the ticket email you receive.

Want to customize the ticket email? You can add your own domain, apply your Stripe branding (colors and logo), and customize the message your attendees receive.

Supported Stripe flows

Lomeo issues QR tickets when a supported Stripe payment completes. These are the supported flows:

When a customer completes a payment via Payment Links, Invoicing, or Stripe Checkout, and the order includes products marked as tickets, Lomeo instantly emails them a QR ticket.

Note: Stripe Subscriptions (products with recurring prices) are not officially supported. Although technically possible, Lomeo is not optimised for subscription products.

Check sales data

Stripe's Transactions and Invoices pages are always the most complete record of your sales. But if you want to check ticket sales specifically, here are two ways to do it:

(1) On the product detail page, open the Lomeo drawer. You'll see recent ticket sales listed there. Click on "Transaction" or "Invoice" to view the details.

Check product sales overview on the product detail page in the Lomeo drawer

On the Invoice or Transaction detail page, open the Lomeo drawer to view ticket details, resend tickets, or cancel tickets for that order.

Check ticket details, resend tickets, or cancel tickets for an order on the Invoice or Transaction detail page in the Lomeo drawer

Note: For no-cost transactions, ticket emails are delivered as usual, but ticket details won't appear in the Lomeo drawer. This is a technical limitation of the Stripe Dashboard. We hope to address this in a future update.


(2) To export all your ticket sales data, go to the Lomeo App Settings page, scroll down to the "Your data & privacy" section, and click "Export data".

Download your ticket sales data from the Lomeo App Settings page

Door control and check-in

Navigate to the App Settings page, scroll down to the "Door Control" section, and click "Create check-in link". A panel will open from the right — select the tickets you want to scan, then click "Create check-in link" at the bottom. The panel will close and your check-in link will appear in the "Door Control" section.

Create a check-in link from the Lomeo App Settings page

Copy the check-in URL (or scan the QR code) and open it on a smartphone. The link opens a lightweight web app where your team can start scanning immediately. The same link can be used on multiple smartphones at once.

Once you open the link on your smartphone, you should see "Ready to scan". Tap "Turn on camera" to continue. You'll be prompted to allow camera access.

Scan a ticket QR code — a green "Checked in" screen should appear. Each QR code can only be scanned once. Scanning the same code again will show a red error screen, indicating the ticket has already been checked in.

Note: The check-in link should only be shared with your team — anyone with the link can scan tickets for your selected events, so keep it safe.

Account customization

We know it's important to have your tickets feel on-brand. On the Lomeo Settings page, you'll find a few options to make that happen.

Let's start with your business info:

Create a check-in link from the Lomeo App Settings page

We recommend reviewing your business name, ticket support email, and event webpage. These fields are automatically filled from your Stripe account, but the information may not be up to date for all accounts.

The notification email is optional — it sends you a copy of every ticket issued. Some organizers find this useful for staying on top of orders (including no-cost orders) in real time.

Branding colors and logo via Stripe

Lomeo uses your Stripe Branding settings to give your attendees a consistent experience from checkout to ticket delivery.

Navigate to your Stripe Branding settings, add a logo, set your Brand color and Accent color, then save. Your ticket email and ticket page (linked from the email) will automatically reflect your logo and brand colors.

Create a check-in link from the Lomeo App Settings page

Add your own domain

Sending tickets from your own email address gives a more professional experience for your attendees.

Scroll to the "Custom domain" section and add your domain. Follow the steps to retrieve your DNS records, then add them to your domain's DNS settings.

Add your own domain

Important: Once your domain is successfully verified, make sure to set your sending email address — for example, [email protected].

Add domain email address in the Lomeo App Settings page