Door control and attendee check-in
Head to the App Settings page and scroll down to the Door Control section, then click Create check-in link. A panel will slide open on the right. Choose which tickets you want to enable for scanning, and click Create check-in link at the bottom. The panel closes, and your new check-in link will appear inside the Door Control section.
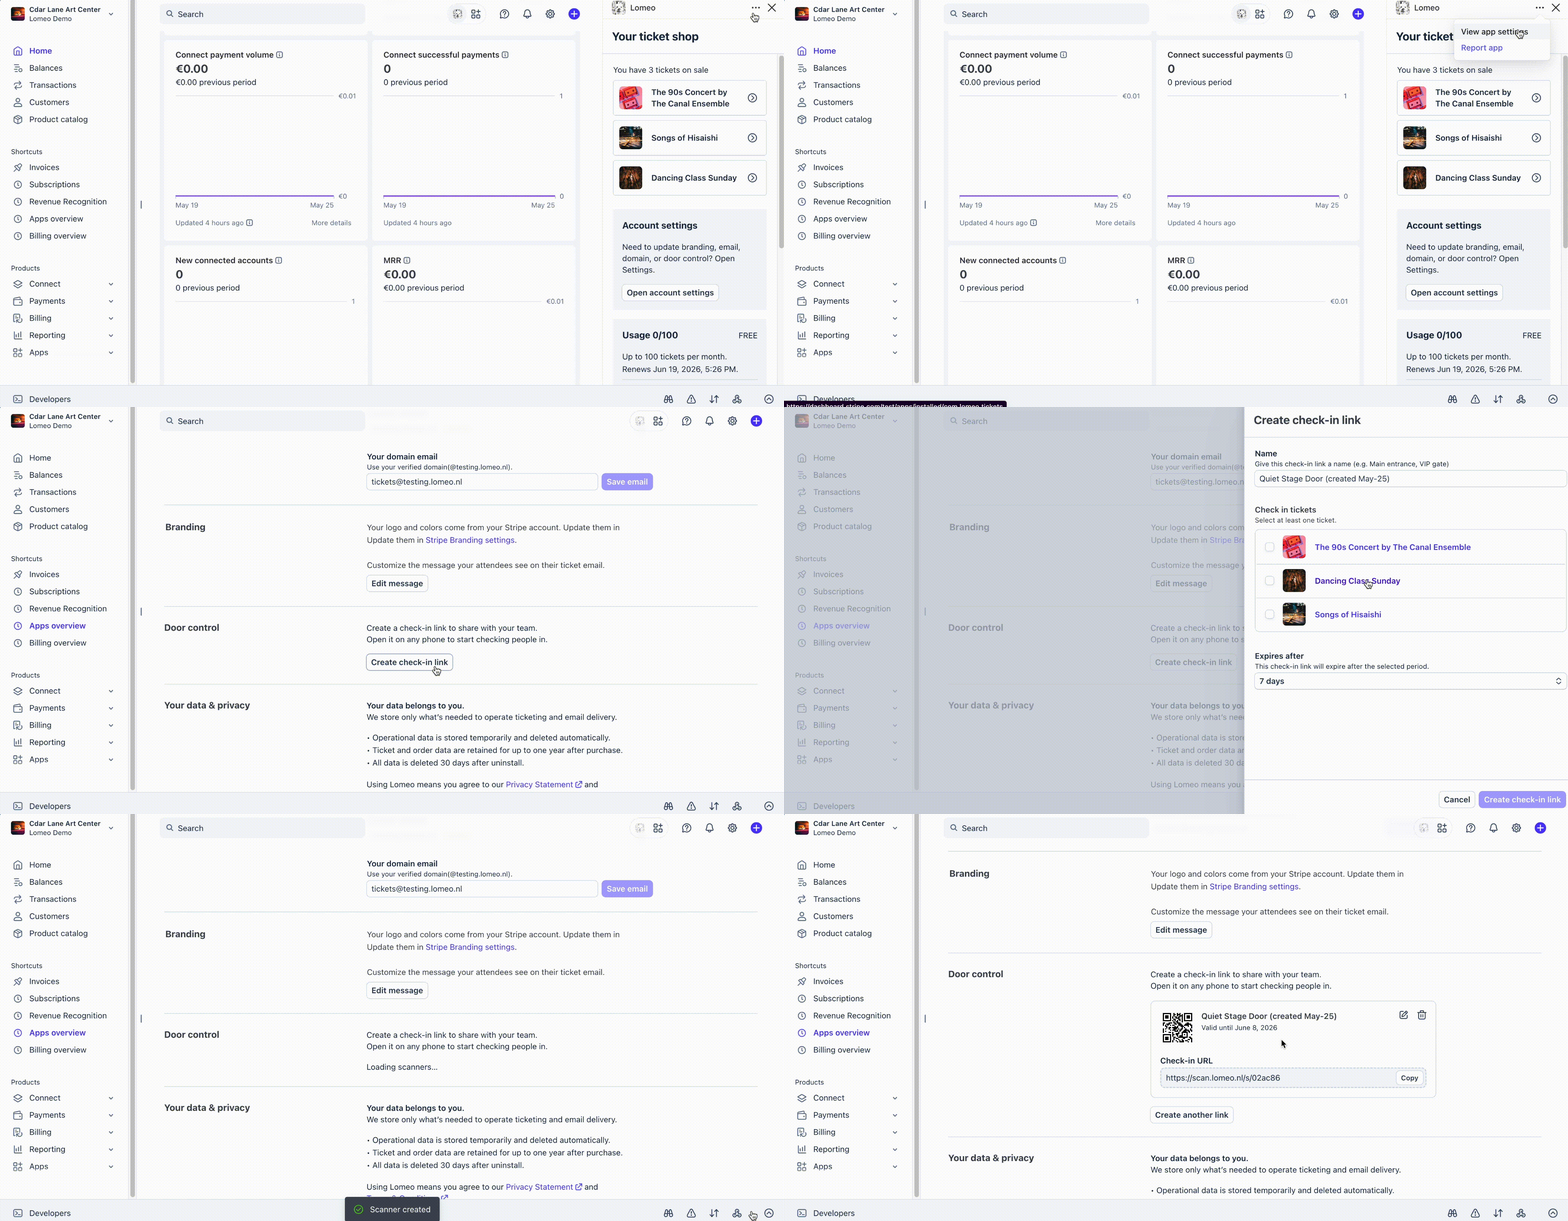
Copy the check-in URL (or scan its QR code) and open it on a smartphone. This link loads a lightweight web app, so your team can start scanning straight away. The same link works simultaneously across multiple phones.
After opening the link on your device, you will see the “Ready to scan” screen. Tap Turn on camera to proceed, then grant camera permissions when prompted.
Simply scan a ticket QR code. A green Checked-in confirmation screen will appear on successful validation. Every QR code can only be scanned once. If you scan the same code a second time, a red error screen will show that this ticket has already been checked in.
Important: Keep your check-in link internal to your team. Anyone who obtains the link can scan tickets for your selected events, so please store it securely.